Using the Per Diem Feature
The Per Diem feature is easy to use but requires some initial setup. Once setup, you can enter a single entry for that day’s per diem allowance and the value will be automatically set. Any entries you do wish to log that are included in that day’s per diem will be displayed but will NOT be included in the total expenses for that day.
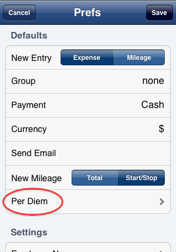
Prefs Screen
To get started, first open the Prefs screen. The app allows you to enter a per diem value that will be used for each log you create. If you are using a log which should not use the Per Diem feature, simple set the Per Diem value found in the Log Info screen to zero. We will take a look at that a bit later. The other option is to not set this preference but rather set the Per Diem value for each log as you wish.
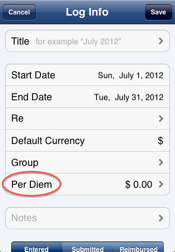
Log Info Screen
To the right shows the Log Info screen. Once a log is opened, the Expense List screen is displayed. In the upper right hand corner is a Log Info button. This button when tapped will display the Log Info screen. Here you can edit the different fields for a given log. The new Per Diem field allows you to set the value to be used.
Once a Per Diem value is set for a log, you can then create a new expense and set the Category to the special “Per Diem” category. Once you set that category, the amount for that expense will the be automatically be set to the Per Diem value for that log.
IMPORTANT: It is up to the user to create a single expense entry for each day with the category set to Per Diem.
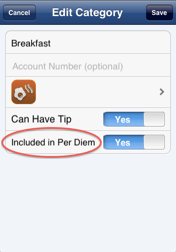
Setting Category Per Diem Preference
Now if you still will be recording expenses that happen to be included in the Per Diem amount allowed by your company, you surely do not want those amounts to contribute to the total. To prevent this, you need to simply flag each category that is included in the Per Diem value. Doing this will cause those expenses with those categories to not be used when calculating the total expenses for the log. To do this, go into the Category List screen and tap the Edit button. Then tap on the category you wish to edit. You will then be presented with the screen on the right.


Copyright 1993-2026. Silverware Software