
Linking Files to Entries
It is now easy to link files received as attachments in emails. In addition, you can also create files from text on the clipboard and link those newly created files to entries in our app.
Linking an Attachment to an Entry
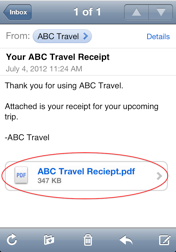
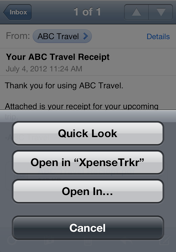
To do this, first launch the Email app. Open the email which contains the attachment file which you wish to link to an XpenseTracker entry. Tap and HOLD on the attachment file until you get the Quick Look screen (see screenshots to the right).
Now select the “Open in XpenseTrkr” option. If the “Open in XpenseTrkr” option is not shown, tap the “Open In...” option and then you will see the XpenseTrkr option.
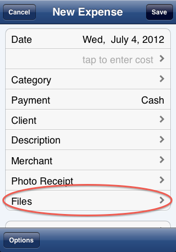
The file will then be saved within XpenseTracker and you will have the opportunity to link that file to a particular entry. This is done by selecting the Files field in an existing or new entry (see the New Expense screenshot showing the Files field).
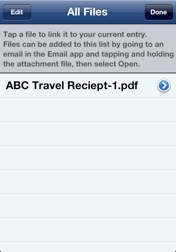
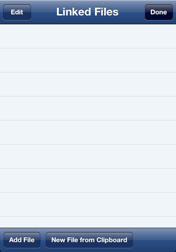
Now at this point, you can link to a file from the files previously downloaded from the email app OR you can create a new file from the contents of the clipboard and link that file to the entry. To add a file from those downloaded from the Email app, tap the “Add File” button. This will display a list of all the files available for linking. Tap on a file to link it to the entry. The Linked Files screen also allows to other features.
-
A.You can tap on the linked file to view it.
-
B.You can swipe across it to Unlink the file (this will not delete the file, just unlink it from that entry)
There is a very useful second method to link a file to an entry. That is from the contents of the clipboard. Suppose you received an email that does not have an attachment but contains the receipt in the body of the email, you can link a file based on that text. Here is how.
-
1.Launch the Email app.
-
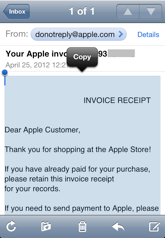
2.Tap and HOLD anywhere there is text within the email. You will then see a Copy / Select All popup. Choose the Select All option.
-
3.Now you will be presented with an option to Copy. Do indeed choose the Copy option. This will place all of the text into the Clipboard.
-
4.Go back into XpenseTracker and open the expense you wish to link the text to. Tap the Files field to open the Linked Files screen. Tap the “New File from Clipboard” button. At this point you will be prompted to name the file to be created. Enter a name and then tap the OK button. That file will then be saved and linked to your entry. The Linked Files entry will be updated to reflect the newly linked files.


Copyright 1993-2026. Silverware Software

